
.png?fit=max&auto=format&n=fTXEPIUfjW4rC1Pi&q=85&s=85d7b852879d29ad2bde9b743307ab0e)
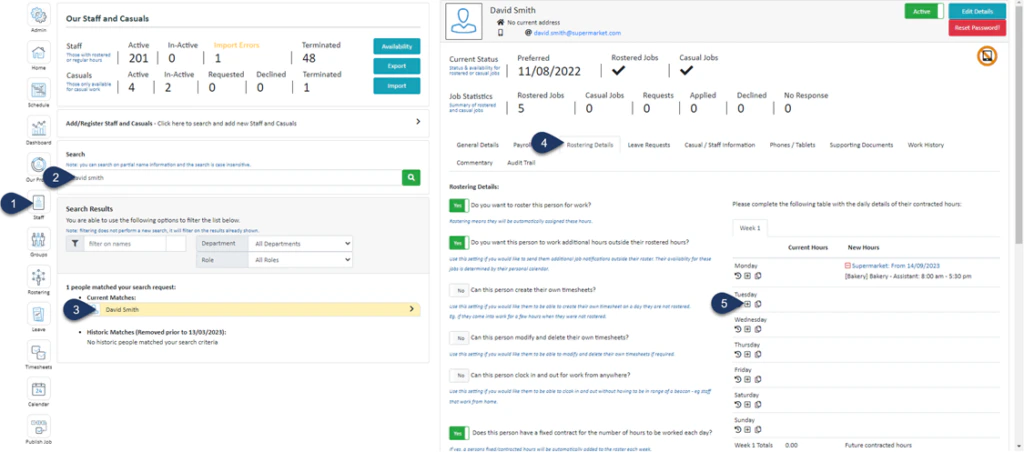
- Select Staff
- Search the name of the employee
- Select the Employee
- Select Rostering Details
- Select the + button next to the day you wish to add contracted hours to
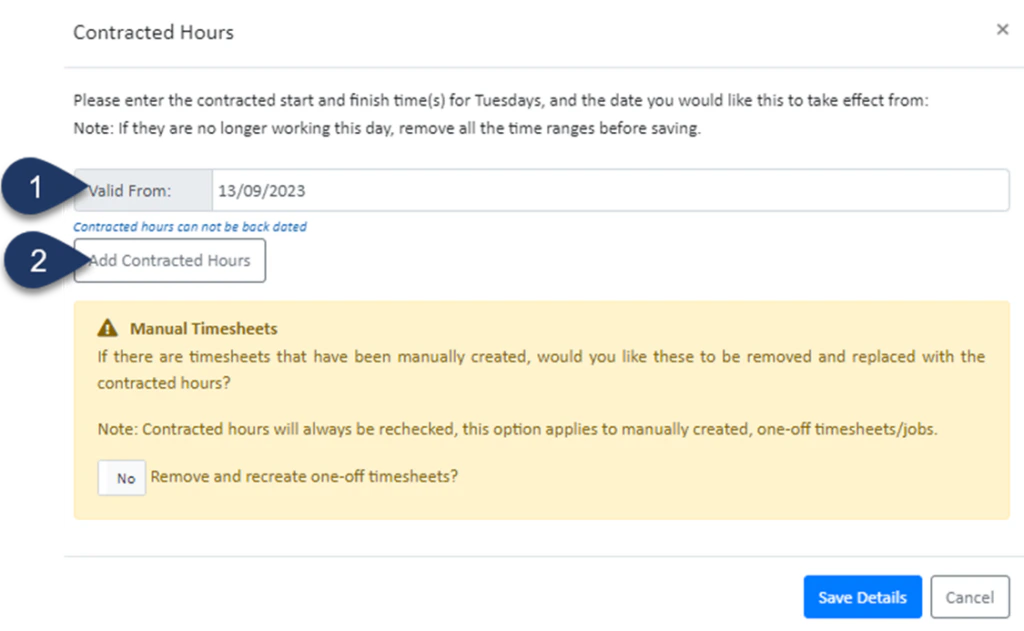
- Select the date these hours are valid from
- Select Add Contracted Hours

- Select the Department
- Select the Job Role
- Enter the Start time of the first shift
- Enter the End time of the first shift
- Select Add Contracted Hours to add the next shift
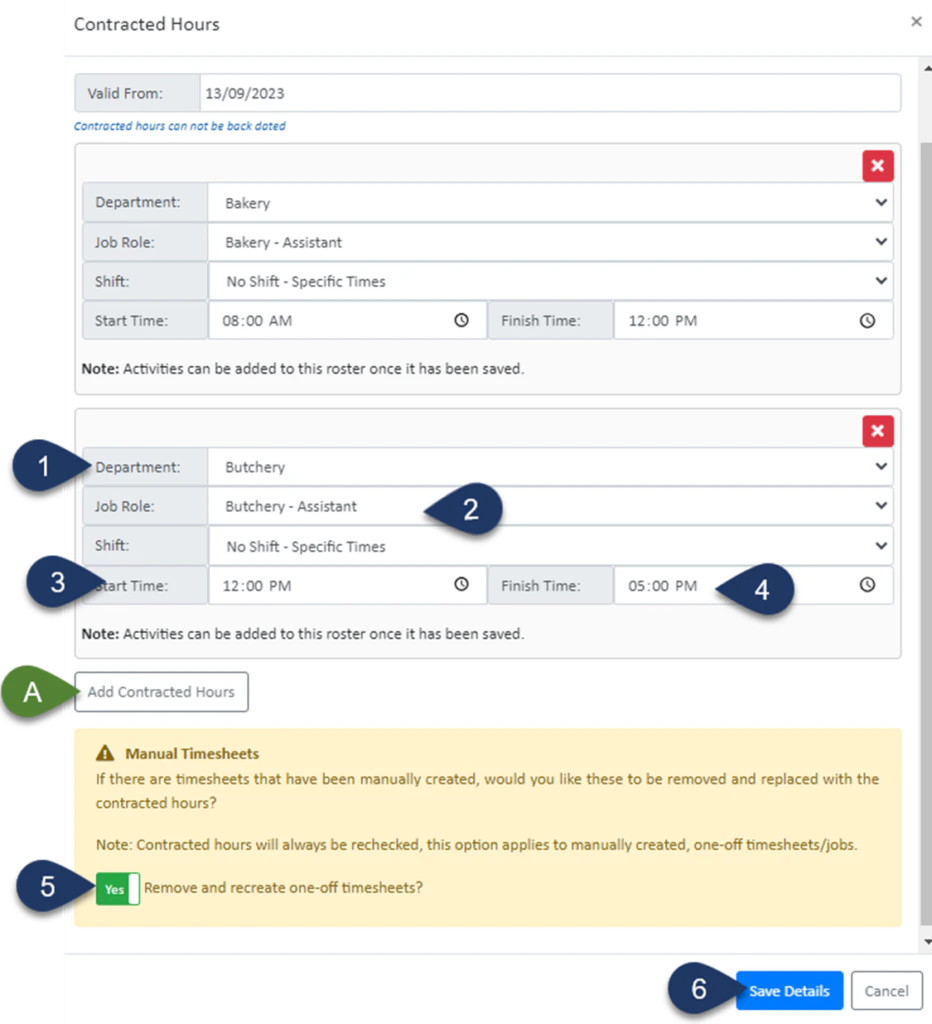
- Select the Department
- Select the Job Role
- Enter the Start time of the second shift
- Enter the End time of the second shift
- Switch the toggle to ‘YES’ to remove any previously created timesheets for this staff member and update any generated rosters
- Select Save Details
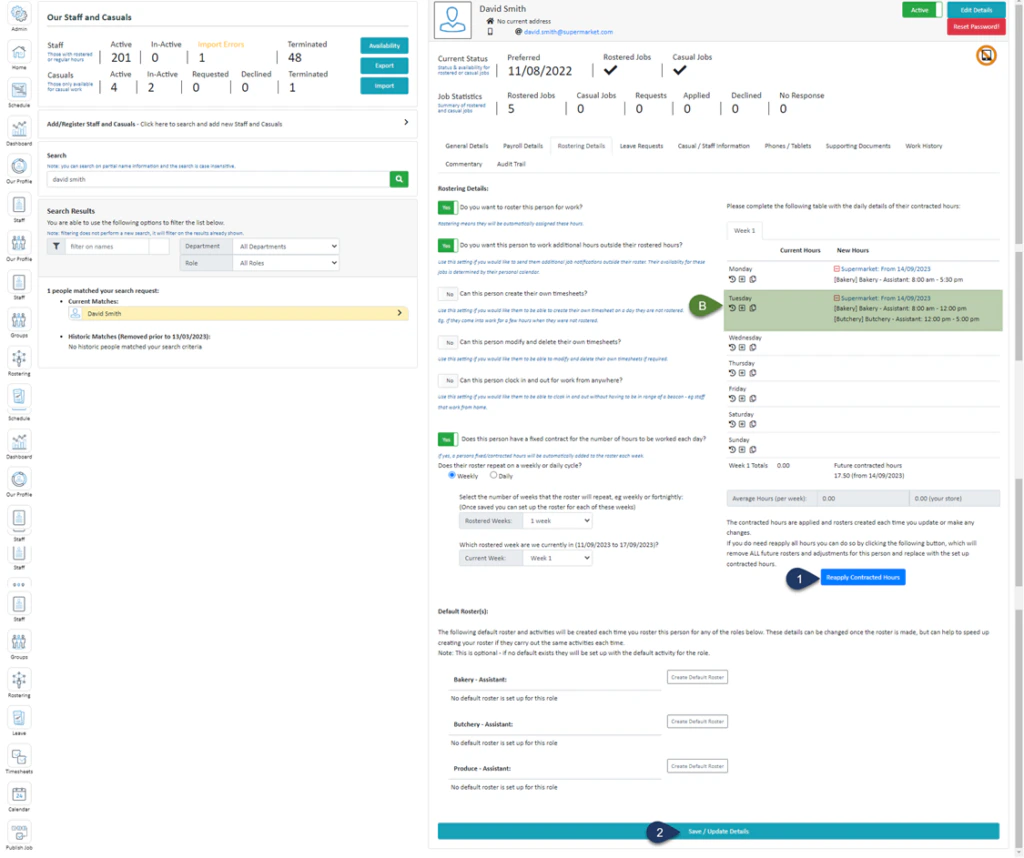
- Click Reapply Contracted Hours
- Select Save/Update Details