> ## Documentation Index
> Fetch the complete documentation index at: https://docs.simplifi.work/llms.txt
> Use this file to discover all available pages before exploring further.
# How to set up weekly contracted hours
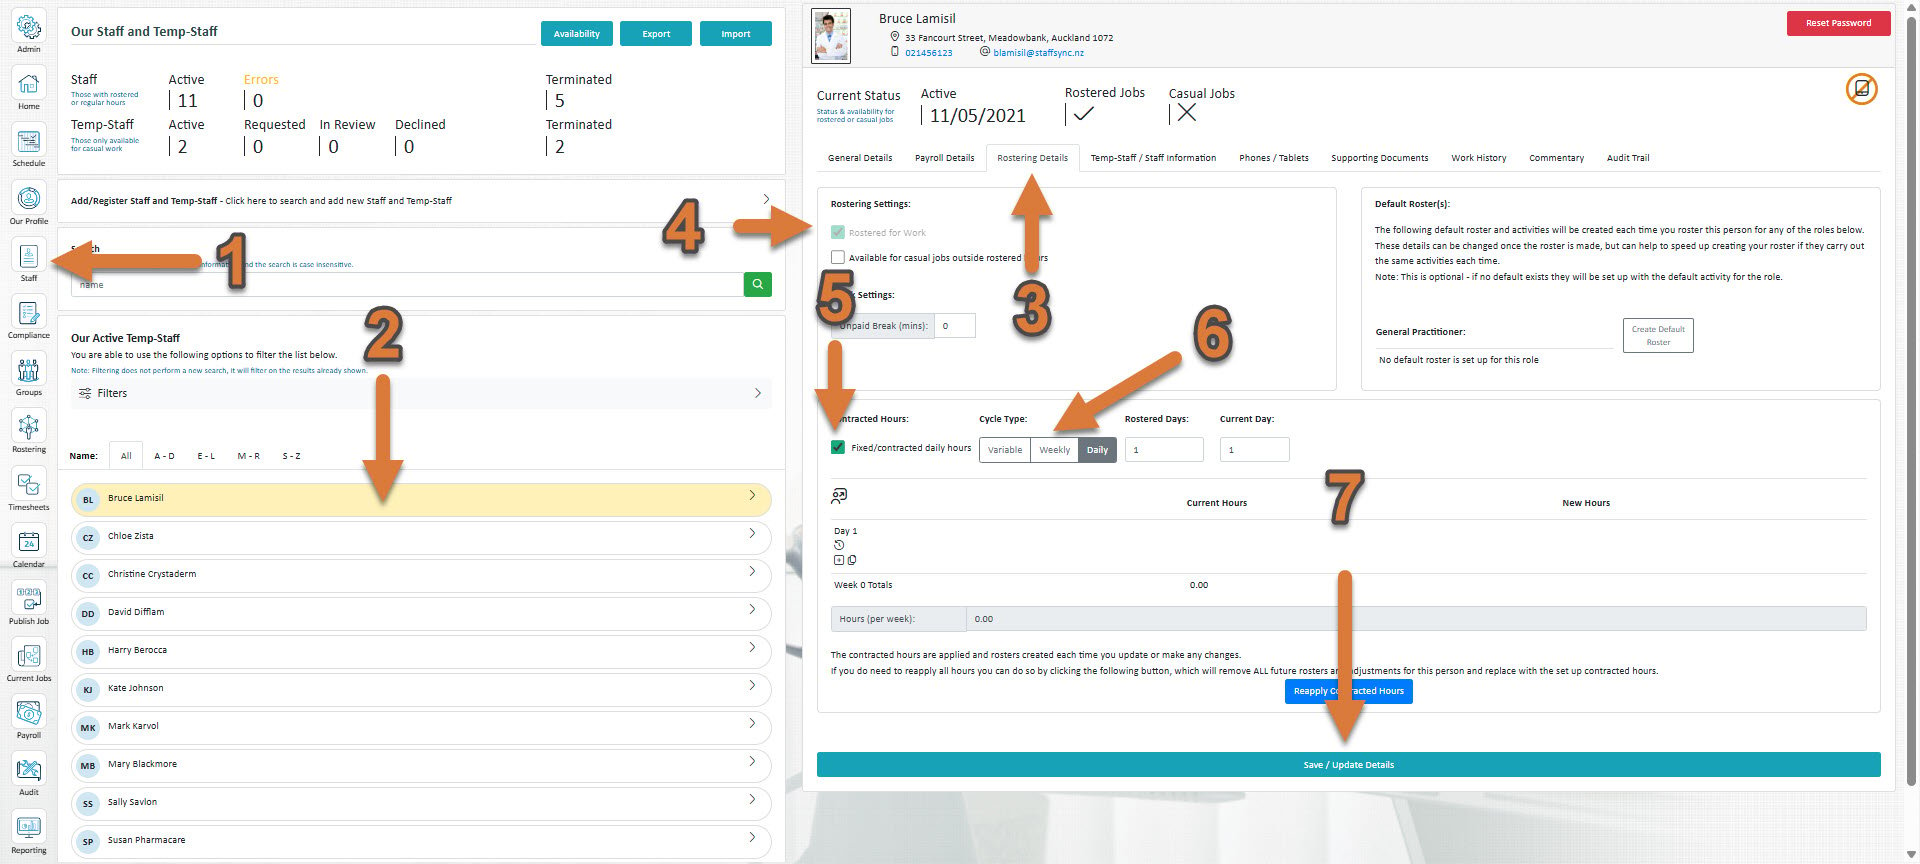
 1. Click **Staff** (If you cannot see the ‘Staff’ button, then you will need to ask your store administrator to grant you access)
2. Select the staff member you'd like to set up new contracted hours for
3. Select **Rostering Details**
4. If if hasn't already been ticked, tick **Rostered for work**
5. **Tick Fixed/contracted daily hours**
6. Click **Weekly**.
7. Press **Save / Update Details**
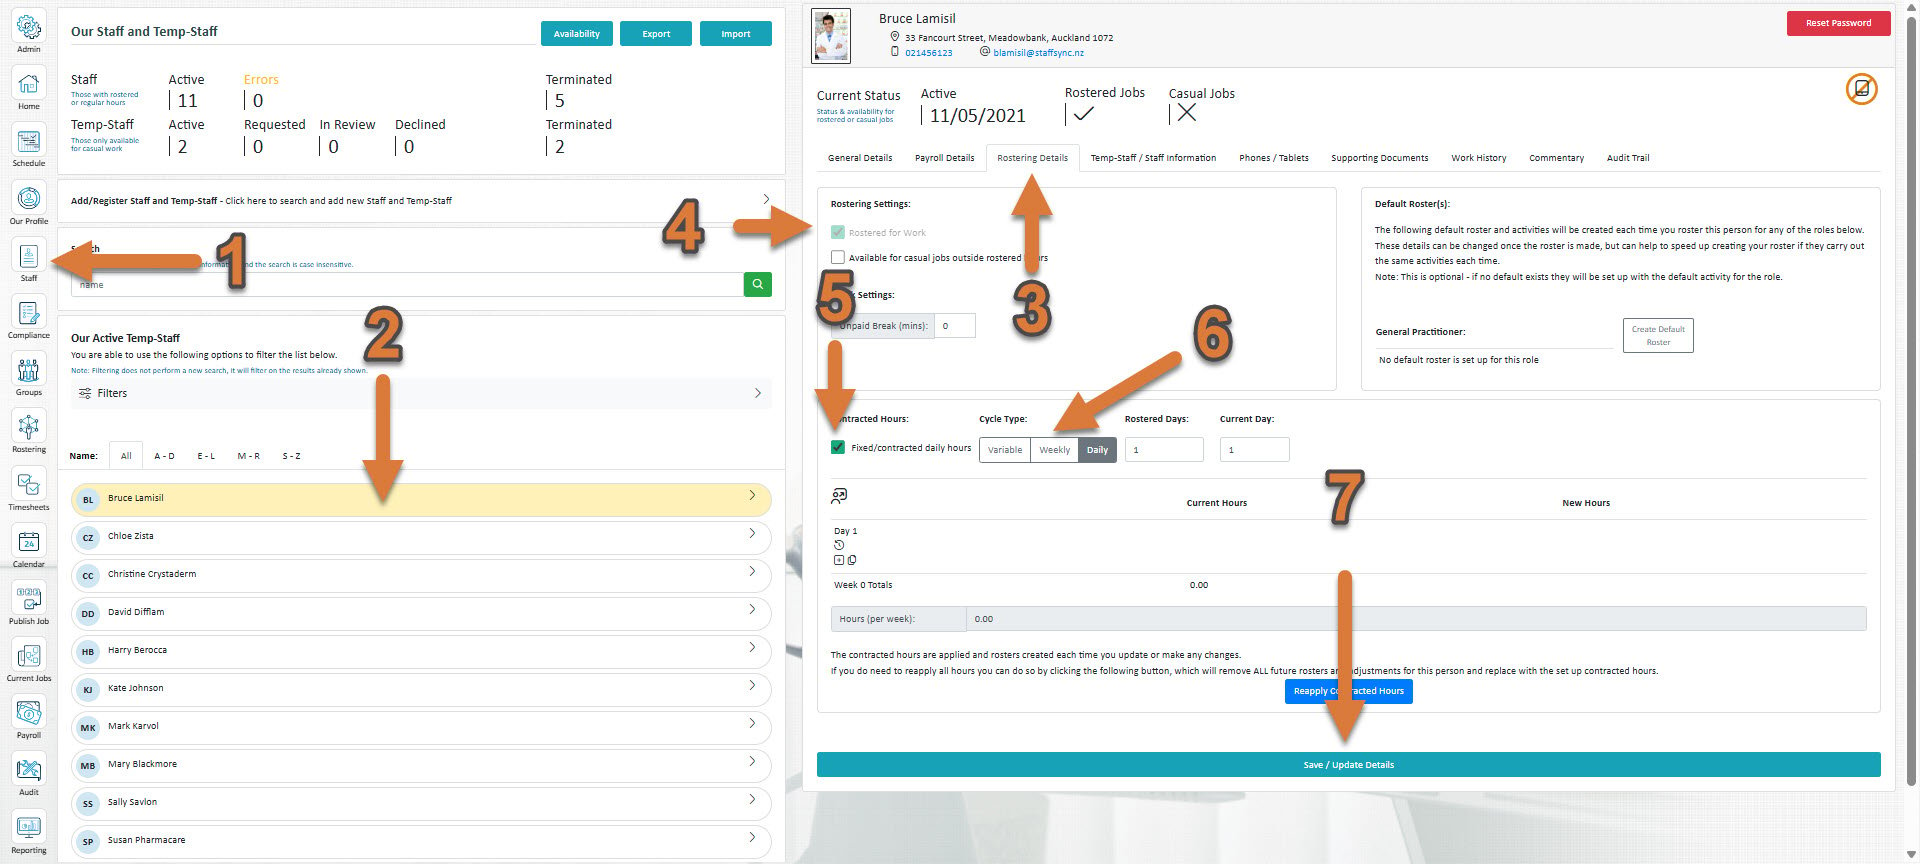
1. Click **Staff** (If you cannot see the ‘Staff’ button, then you will need to ask your store administrator to grant you access)
2. Select the staff member you'd like to set up new contracted hours for
3. Select **Rostering Details**
4. If if hasn't already been ticked, tick **Rostered for work**
5. **Tick Fixed/contracted daily hours**
6. Click **Weekly**.
7. Press **Save / Update Details**
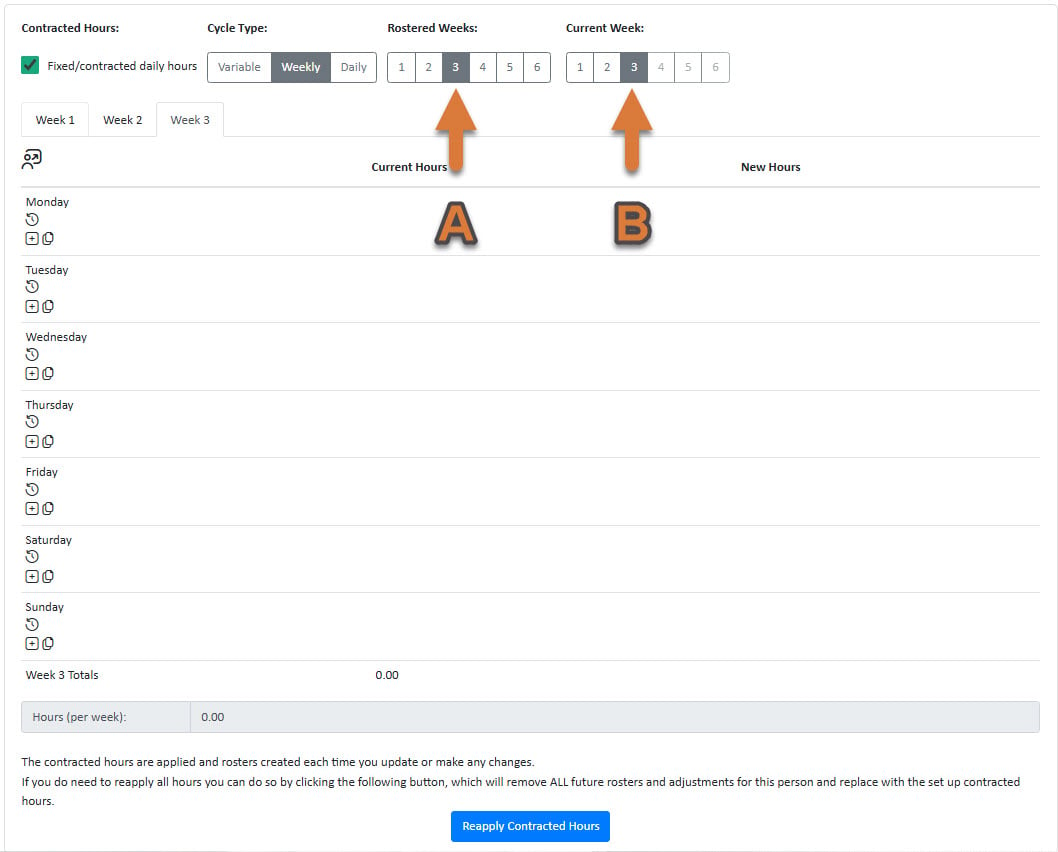 Under A, you can see a selector for the different amount of weeks you'd like for there to be in the weekly contracted hours cycle. For example, if I wanted a schedule where I had one week with 4 shifts, the next week to have 5, and the week after 6 and then have them repeat in that order, I would chose 3 rostered weeks.
Under B, you can specify what week of this weekly cycle **we are currently on**.
B lets you select the current week. If for example in the same example, I wanted this week to be the week with 6 shifts, even though that's the second week in the cycle, I would select 2 as the current week.
Under A, you can see a selector for the different amount of weeks you'd like for there to be in the weekly contracted hours cycle. For example, if I wanted a schedule where I had one week with 4 shifts, the next week to have 5, and the week after 6 and then have them repeat in that order, I would chose 3 rostered weeks.
Under B, you can specify what week of this weekly cycle **we are currently on**.
B lets you select the current week. If for example in the same example, I wanted this week to be the week with 6 shifts, even though that's the second week in the cycle, I would select 2 as the current week.
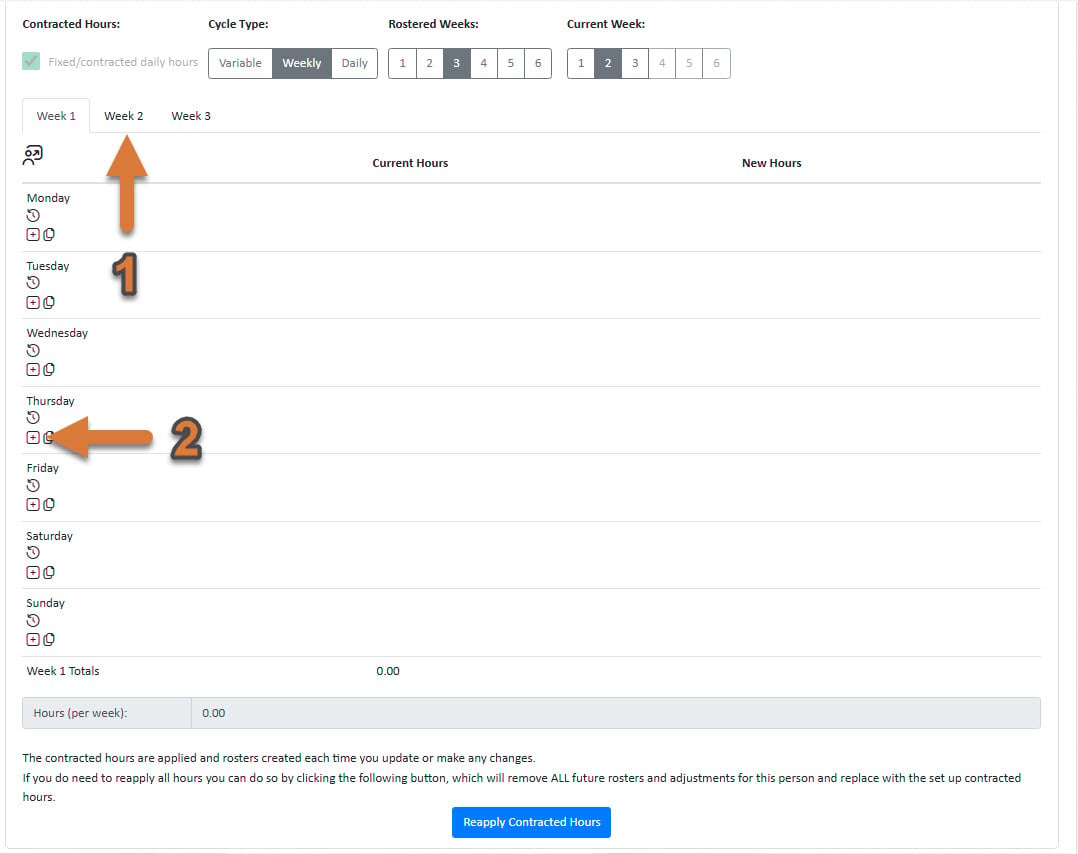 1. After selecting the amount of rostered weeks you'd like, press **Save Details**. You will be able to see the amount that you've selected now appearing as tabs at the top. Click on one to edit it.
2. Press the small plus button to add hours to a particular day
1. After selecting the amount of rostered weeks you'd like, press **Save Details**. You will be able to see the amount that you've selected now appearing as tabs at the top. Click on one to edit it.
2. Press the small plus button to add hours to a particular day
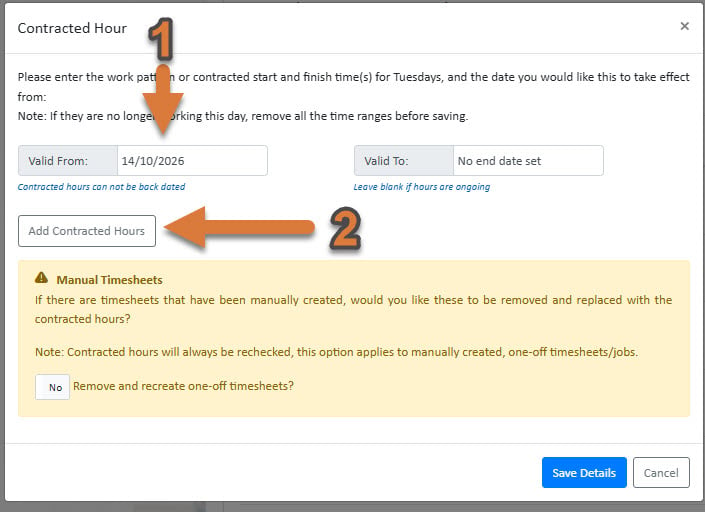 1. Select a date that you'd like the contracted hours to start from
2. Press **Add Contracted Hours** to add contracted hours
1. Select a date that you'd like the contracted hours to start from
2. Press **Add Contracted Hours** to add contracted hours
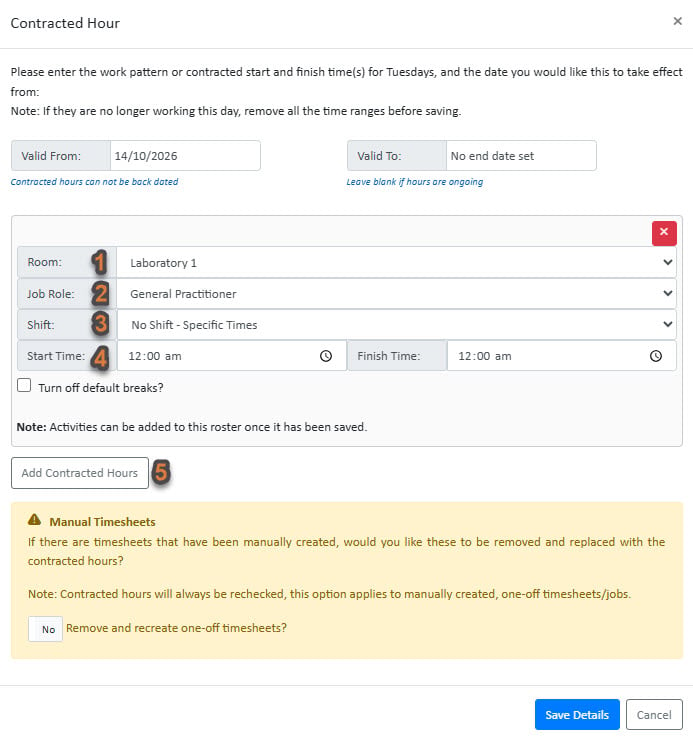 1. Select the **Department**
2. Select the **Job Role**
3. Select the **Shift**
4. Select the **Start Times**
5. If you wish to set up multiple shifts, you can add one here
**Press Save Details**
1. Select the **Department**
2. Select the **Job Role**
3. Select the **Shift**
4. Select the **Start Times**
5. If you wish to set up multiple shifts, you can add one here
**Press Save Details**
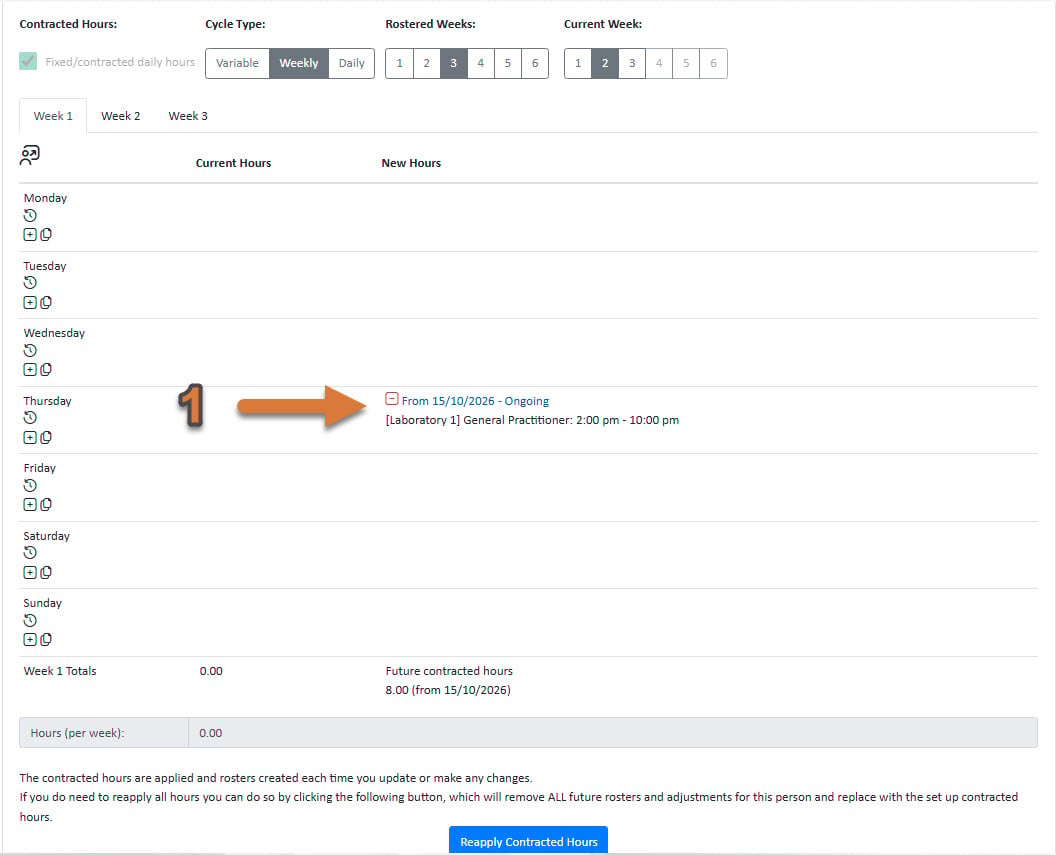 1. You will now see the contracted hours saved to the first week of your weekly contracted hours cycle
This documentation is built and hosted on [Mintlify](https://mintlify.com), a developer documentation platform.
1. You will now see the contracted hours saved to the first week of your weekly contracted hours cycle
This documentation is built and hosted on [Mintlify](https://mintlify.com), a developer documentation platform.