> ## Documentation Index
> Fetch the complete documentation index at: https://docs.simplifi.work/llms.txt
> Use this file to discover all available pages before exploring further.
# How to Set Up Contracted Hours with Multiple Shifts
Example: This employee has a permanent roster where they work in the bakery as a bakery assistant from 8:00 am to 12:00 pm, and then in the butchery as a butchery assistant from 12:00 pm to 5:00 pm.
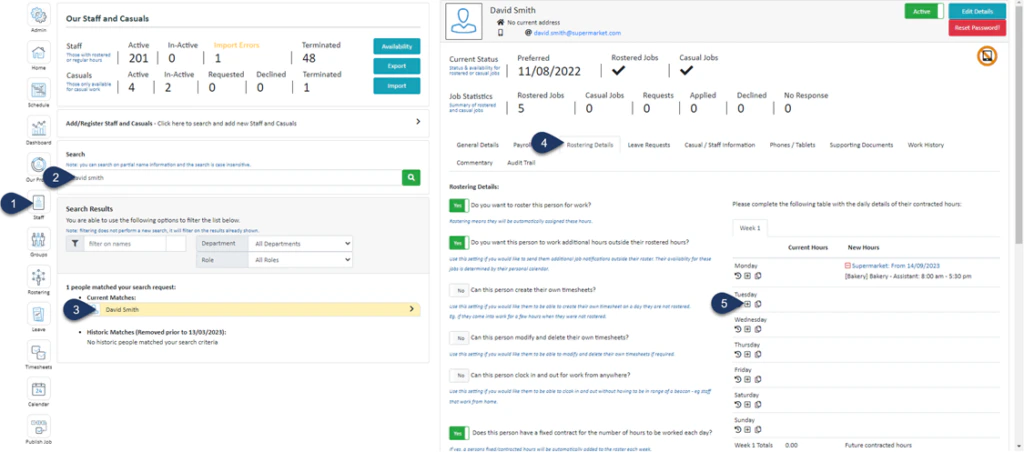 1. Select **Staff**
2. **Search** the name of the employee
3. Select the **Employee**
4. Select **Rostering Details**
5. Select the **+** button next to the day you wish to add contracted hours to
1. Select **Staff**
2. **Search** the name of the employee
3. Select the **Employee**
4. Select **Rostering Details**
5. Select the **+** button next to the day you wish to add contracted hours to
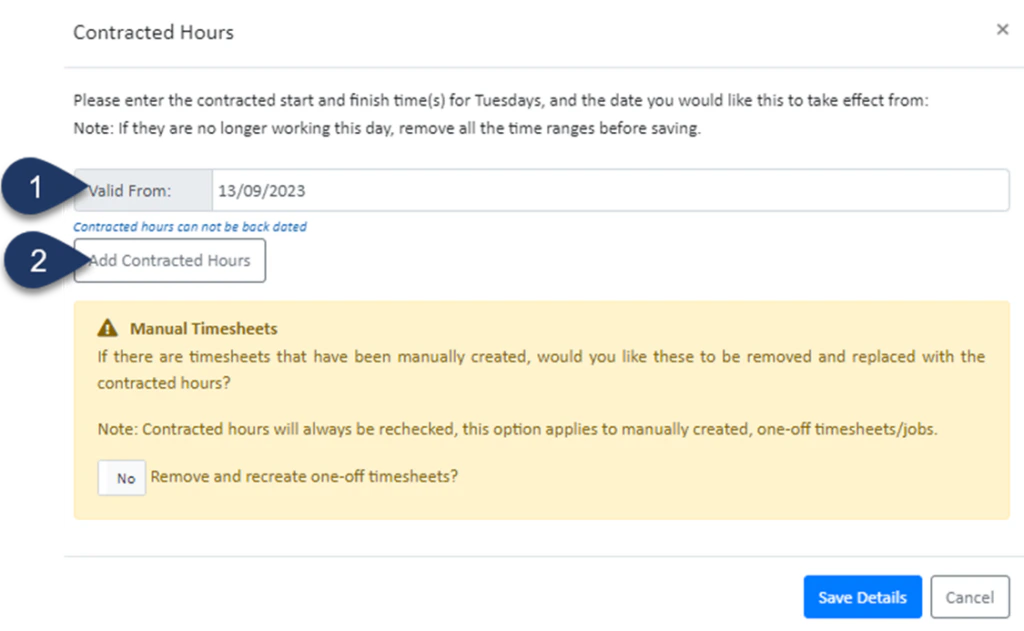 1. Select the **date** these hours are valid from
2. Select **Add Contracted Hours**
1. Select the **date** these hours are valid from
2. Select **Add Contracted Hours**
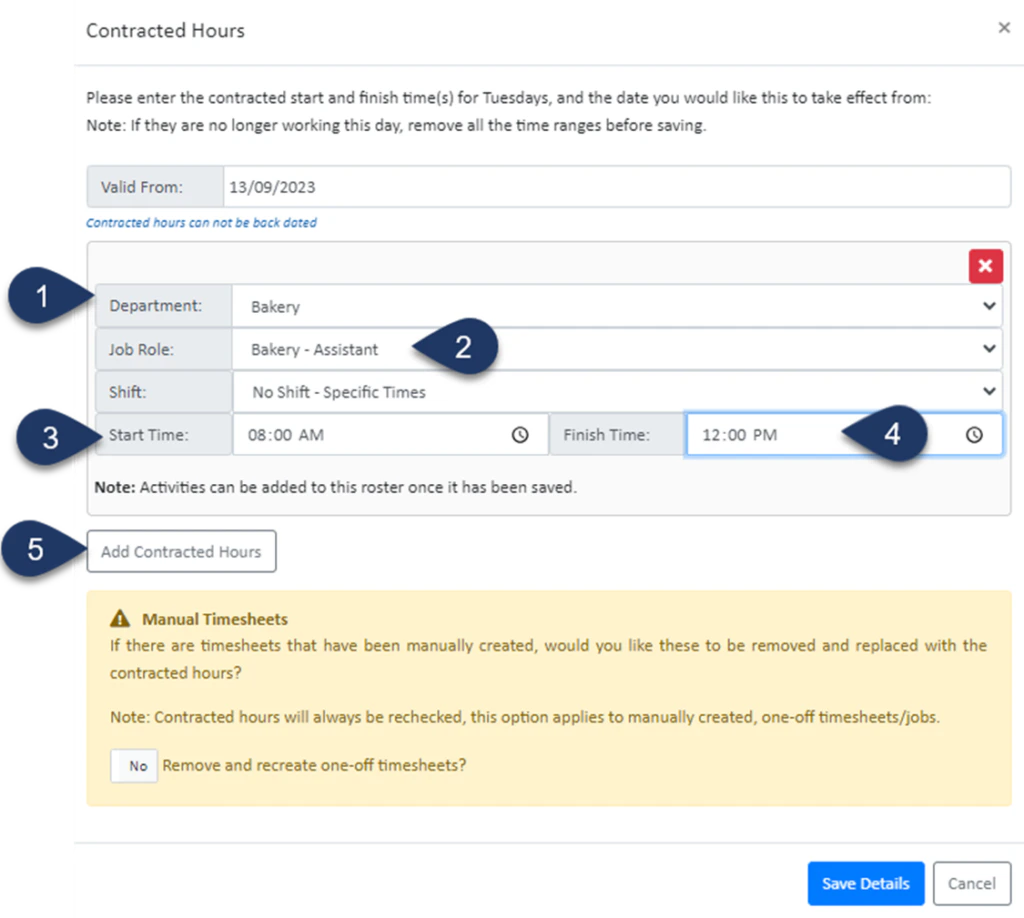 1. Select the **Department**
2. Select the **Job Role**
3. Enter the **Start time** of the first shift
4. Enter the **End time** of the first shift
5. Select **Add Contracted Hours** to add the next shift
1. Select the **Department**
2. Select the **Job Role**
3. Enter the **Start time** of the first shift
4. Enter the **End time** of the first shift
5. Select **Add Contracted Hours** to add the next shift
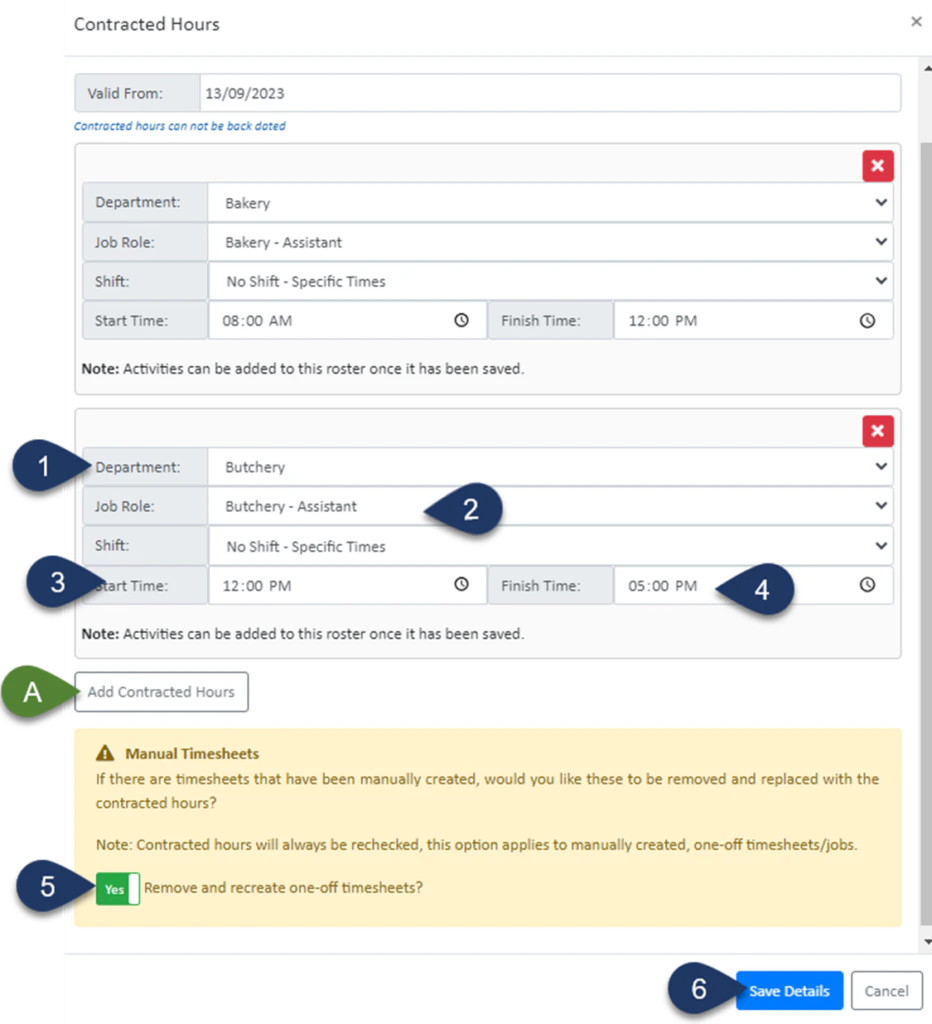 1. Select the **Department**
2. Select the **Job Role**
3. Enter the **Start time** of the second shift
4. Enter the **End time** of the second shift
5. Switch the toggle to ‘**YES’** to remove any previously created timesheets for this staff member and update any generated rosters
6. Select **Save Details**
**A. If you wish to add a third shift, click ‘Add Contracted Hours‘ again and enter the details of the third shift**
1. Select the **Department**
2. Select the **Job Role**
3. Enter the **Start time** of the second shift
4. Enter the **End time** of the second shift
5. Switch the toggle to ‘**YES’** to remove any previously created timesheets for this staff member and update any generated rosters
6. Select **Save Details**
**A. If you wish to add a third shift, click ‘Add Contracted Hours‘ again and enter the details of the third shift**
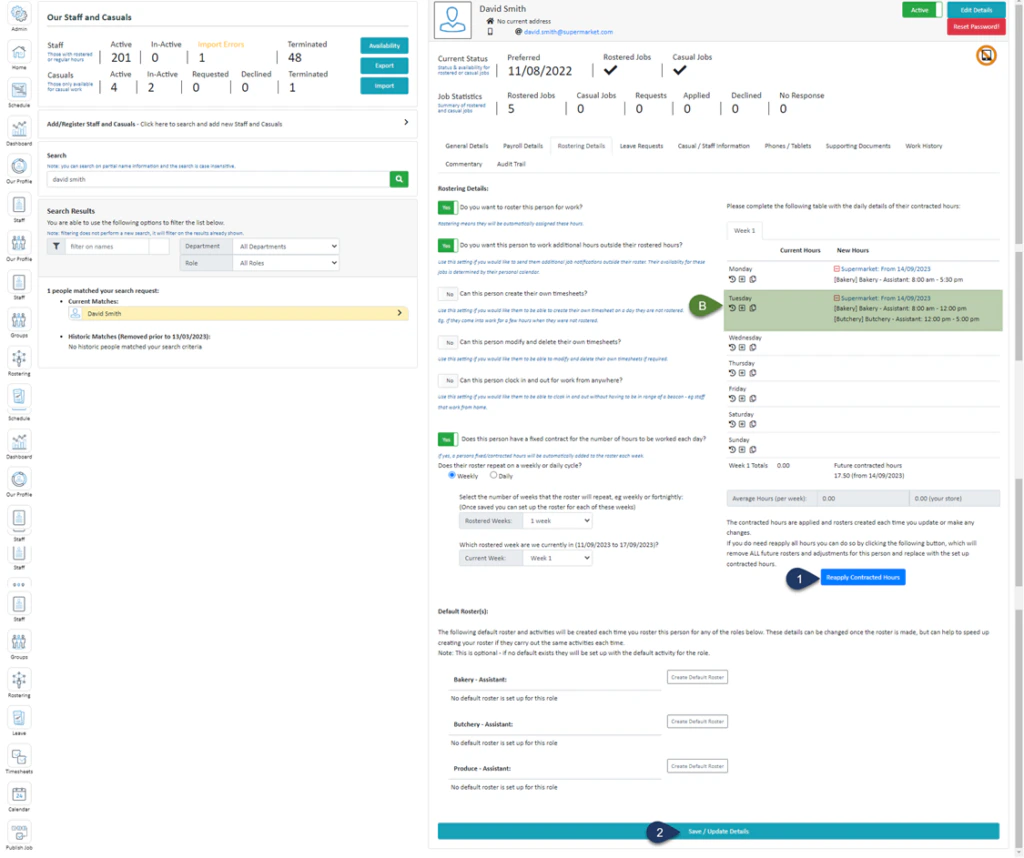 1. Click **Reapply Contracted Hours**
2. Select **Save/Update Details**
**B. The contracted hours you have added should appear here under the ‘New Hours’ Column**
1. Click **Reapply Contracted Hours**
2. Select **Save/Update Details**
**B. The contracted hours you have added should appear here under the ‘New Hours’ Column**