> ## Documentation Index
> Fetch the complete documentation index at: https://docs.simplifi.work/llms.txt
> Use this file to discover all available pages before exploring further.
# How to Make a File Import Template
To import custom files, you must first make a template to support this. For this tutorial, we will use an example Excel file that looks like this:

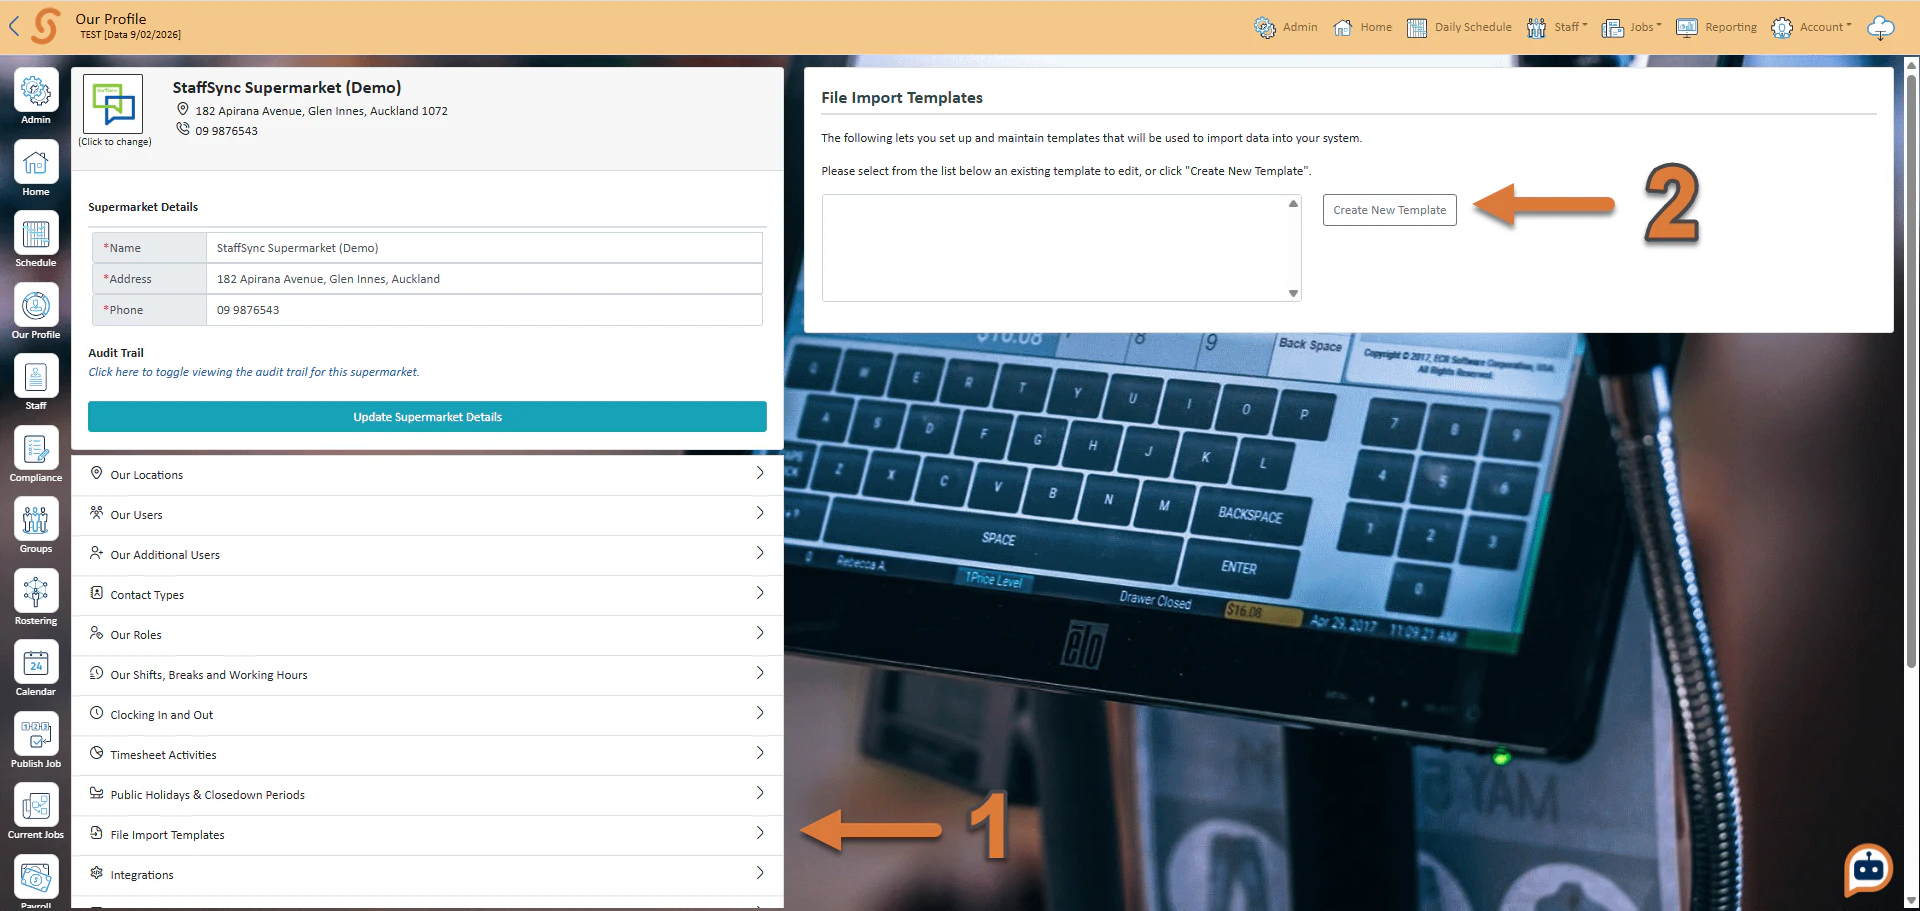 1. From the **Our Profile** tab, press **File Import Templates**
2. Press **Create New Template**
You must then press **Browse** and upload the file you want to make a template for. This **must** be a **delimited file**. Delimited files are files where the data is structured by each line representing a record and each field being separated by a specific character such as a comma. If you are using **excel**, save your file as a **CSV** and upload this file.
If you try to upload a file that is not delimited, you will get an error
1. From the **Our Profile** tab, press **File Import Templates**
2. Press **Create New Template**
You must then press **Browse** and upload the file you want to make a template for. This **must** be a **delimited file**. Delimited files are files where the data is structured by each line representing a record and each field being separated by a specific character such as a comma. If you are using **excel**, save your file as a **CSV** and upload this file.
If you try to upload a file that is not delimited, you will get an error
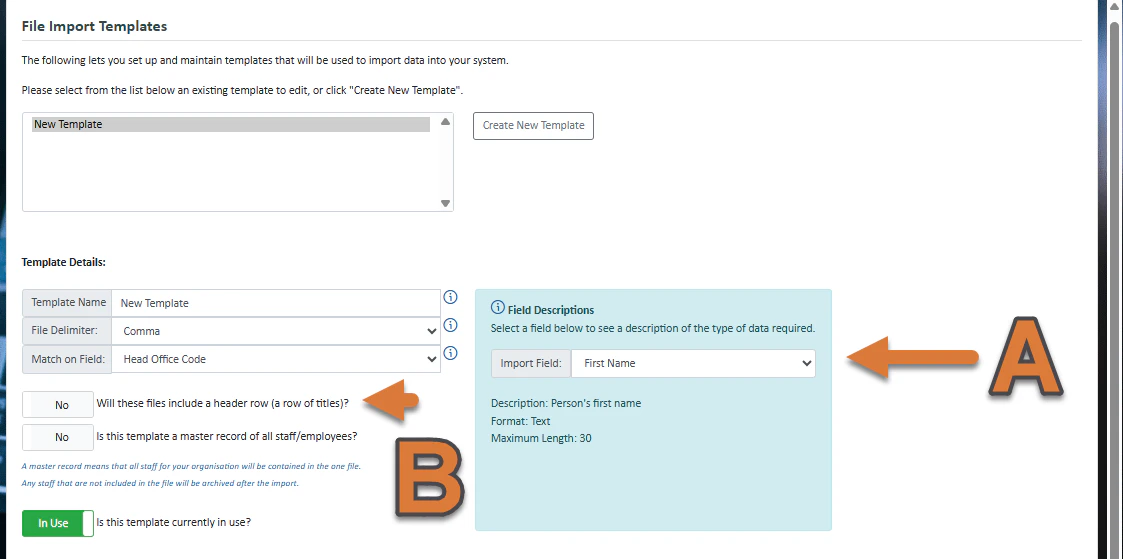 After uploading you will be met by this screen. Here you can configure settings as appropriate. Some settings may be automatically filled in for you, such as the file delimiter (comma for CSV files).
* **B**
If your files will have headers (as does our example file) then you need to turn on this box. If this is a master record, turn on that box as well and if you want to start using this template in your organisation, press **in use**.
* **A**
Fields will have restrictions on the type of data that can be inputted including the length and format. You can view any of these under the field descriptions box. Select an import field to see the restrictions as well as a description of what this data does.
After uploading you will be met by this screen. Here you can configure settings as appropriate. Some settings may be automatically filled in for you, such as the file delimiter (comma for CSV files).
* **B**
If your files will have headers (as does our example file) then you need to turn on this box. If this is a master record, turn on that box as well and if you want to start using this template in your organisation, press **in use**.
* **A**
Fields will have restrictions on the type of data that can be inputted including the length and format. You can view any of these under the field descriptions box. Select an import field to see the restrictions as well as a description of what this data does.
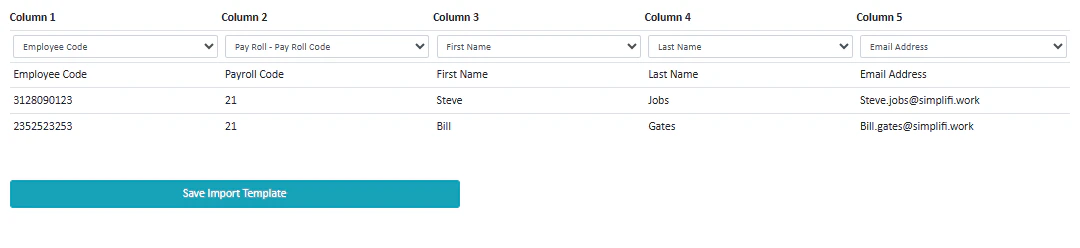 Next you need to match up the columns to their corresponding fields. After you have completed this, press **save import template.**
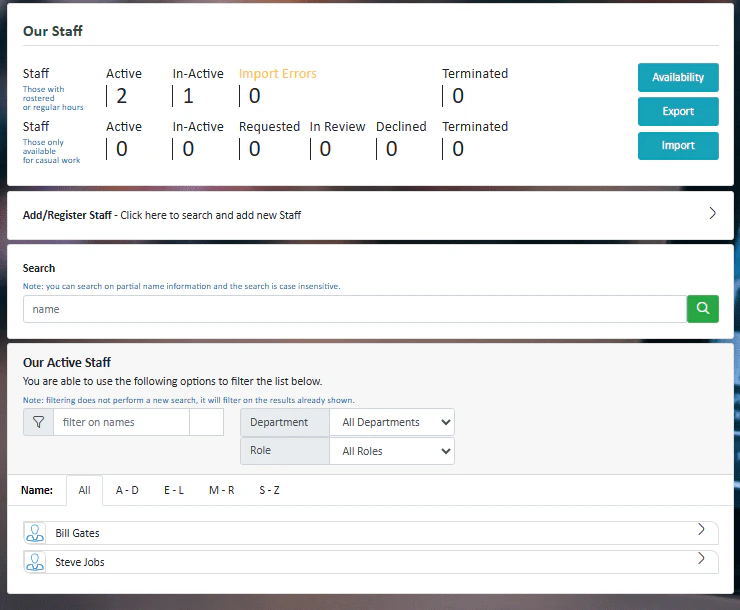 Now pressing on the **Staff** module, you press **Import,** then import the file you want to import and see that using the template now works! Note that to create an employee record as an absolute minimum, the following information is required: **Employee Code or Payroll Code, First Name, Last Name, Email Address**.